
 1446
1446
Prepare to record
To begin, open the presentation you want and click the Slide Show tab.
Tip: If your presentation has a lot of slides, you might find it more convenient to work in Slide Sorter view. Click View > Slide Sorter to try it out.
Here are some things to check before you begin recording:
-
If you want to record only part of your slide deck, do one of the following before you begin:
-
Select the slides you don't want to include, and click Hide Slide.
OR
-
Click Custom Show > Custom Slide Show > + (add).

-
-
Use the Rehearse button to change the timing between slides without affecting the narration or gestures you've already recorded.

-
Make sure your microphone is set up correctly. On the Mac, go to System Preferences > Sound.
Record your slide show
If you want to add narration or commentary to the slide show, make sure your microphone is set up and working.
To start recording:
-
Click the Slide Show tab, select the slide where you want the recording to begin, and then click Record Slide Show.

-
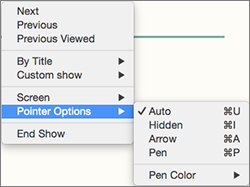
During recording, use Ctrl+click to access the recording commands that let you navigate through the slides, change cursors, or trigger screen blackouts or whiteouts.
-
Click End Show to stop recording.
-
A Save dialog box appears. Click Yes to save your recording, or No if you want to record it again.
Saving overwrites anything you've previously recorded. If you want to record another slide show with the same set of slides, save your presentation file with a different name.
-
Click Play from Start to preview your recording.

